Finding Your Way Around
Every screen in the application is built from the same frame, and almost every screen inside that frame is the same kind of list.
Every screen in the application is built from the same frame, and almost every screen inside that frame is the same kind of list. Learning both once makes the remaining ninety pages familiar on first sight, which is why this chapter comes before any of them.
The workspace
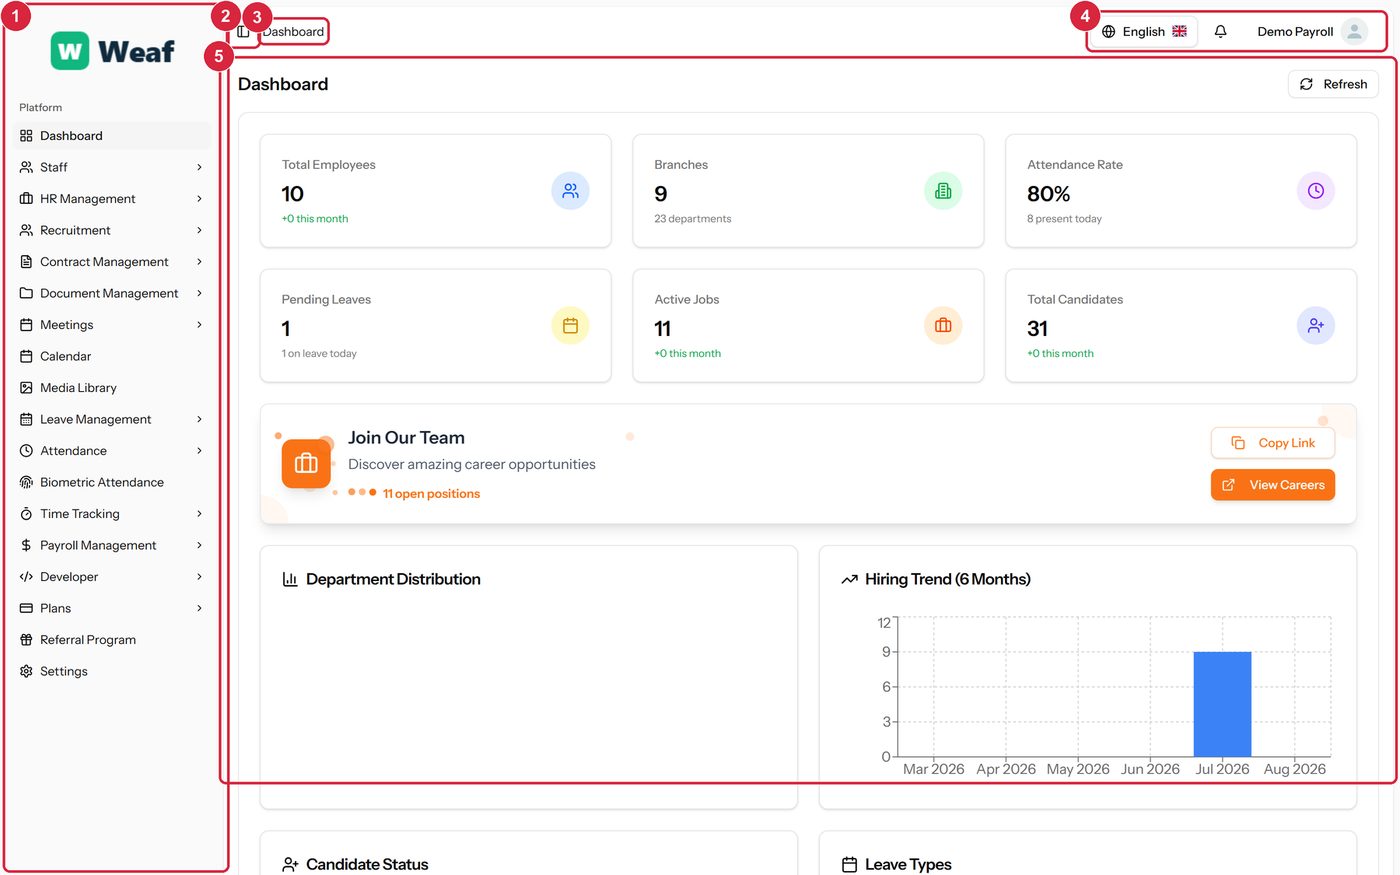
1 Module sidebar — every module in the system. Groups expand to reveal their pages, and the current page is highlighted.
2 Collapse the sidebar — narrows the sidebar to icons when you want more room.
3 Breadcrumb trail — where you are, and a way back up.
4 Language, alerts and account — the interface language, notifications, and the menu holding your profile and sign-out.
5 Working area — the page itself. Everything else stays put as you move between pages.
The dashboard
The landing screen after signing in. It answers “what needs my attention today?” with counts across the whole system — headcount, branches, attendance, outstanding leave, open jobs and candidates — and charts showing how the workforce is distributed and how hiring has moved over six months.
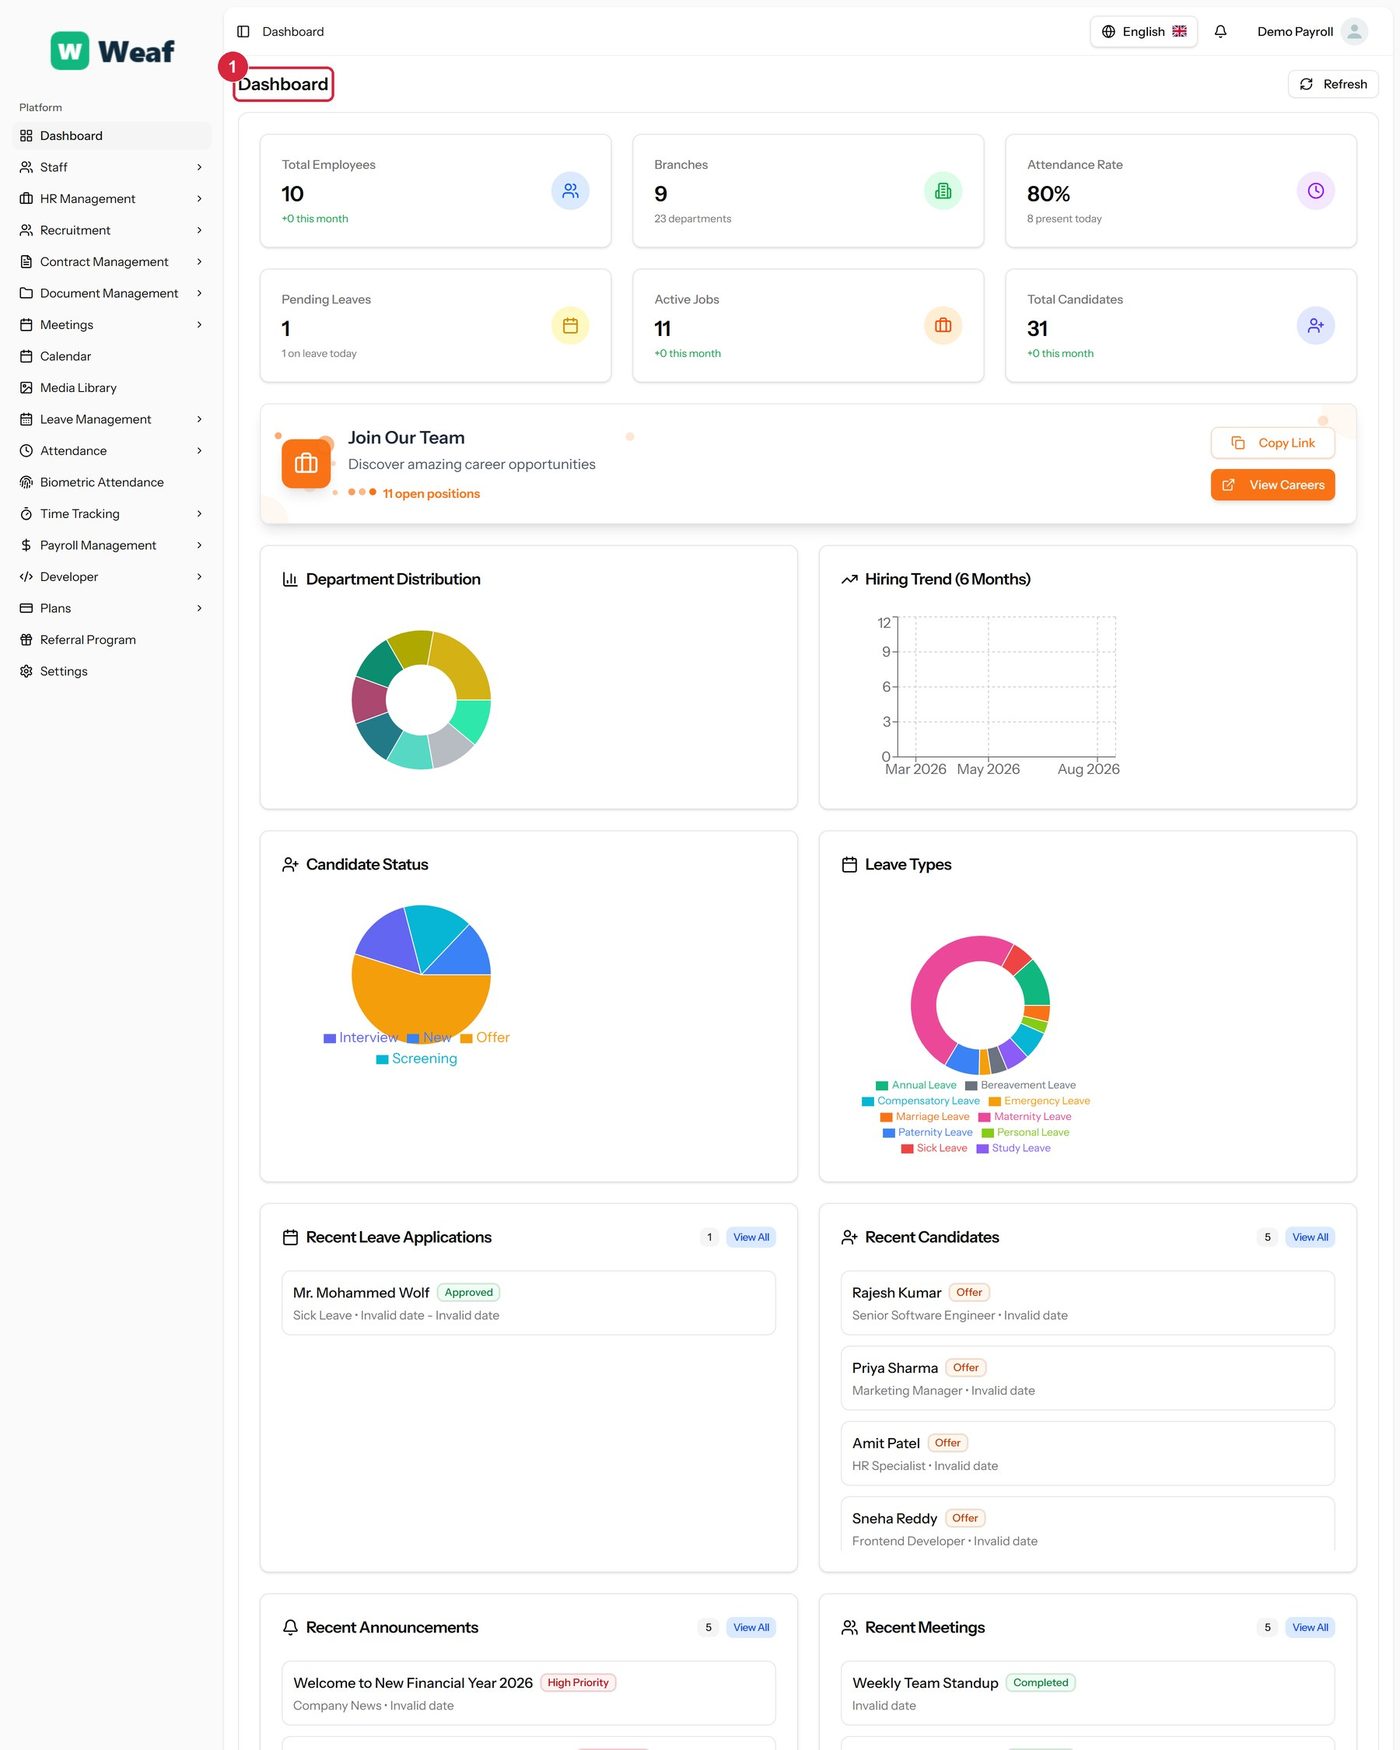
The counts are live. A figure that looks wrong here is usually a sign that records elsewhere are incomplete rather than that the dashboard is mistaken — an attendance rate below expectation, for instance, generally means attendance has not been recorded rather than that nobody came to work.
How every list page works
Most pages in Weaf HR list records of one kind and let you add, search, filter and edit them. They all share the same layout, shown below on the employee list.
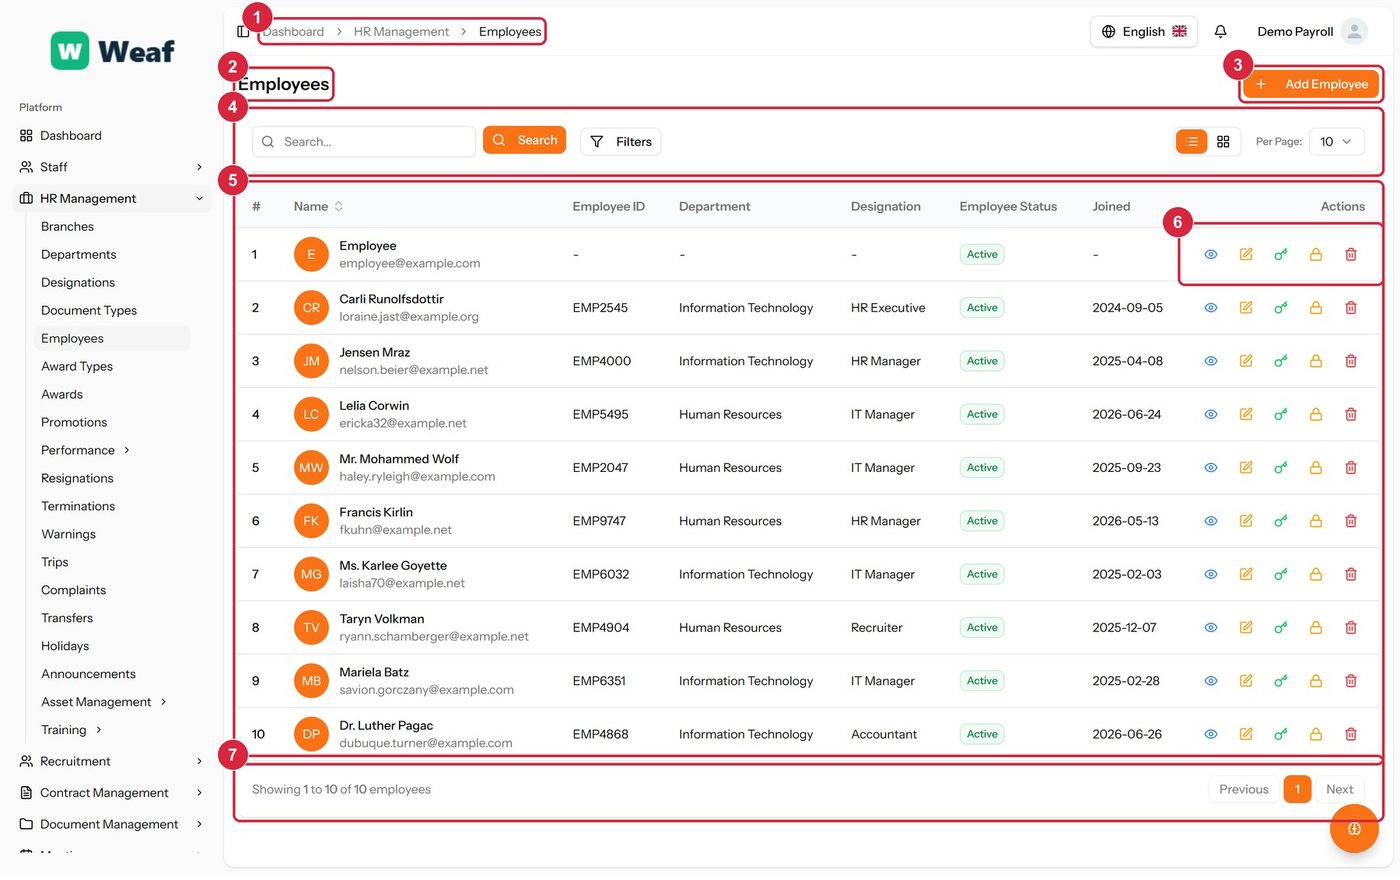
1 Breadcrumb trail — which module and page you are in.
2 Page title — what this list holds.
3 Primary action — adds a new record. Always at the top right, always named after the record.
4 Rows per page — how many records to show at once.
5 Records table — the records themselves, one per row.
6 Row actions — what you can do to a single record — typically view, edit, and delete.
7 Paging — how many records there are, and the way to the rest.
From here on, this manual does not repeat these controls. Each page is shown with its title, its primary action and its table marked, and the text covers what is particular to that page.
| Note: Row actions include deletion on most pages. Deleting a record that other records point at — a department with employees in it, for example — is refused or leaves those records incomplete. Prefer marking something inactive to deleting it. |
|---|